Installing LED strip lights over your bed in your bedroom can transform your bedroom into a comfortable, modern space with adjustable lighting to enhance the atmosphere. Whether you want to create a peaceful sleeping atmosphere or an energizing relaxation atmosphere, LED strip lights are a simple, energy-efficient solution.
In this guide, we will analyze where to install LED strip lights over your bed and walk you through the steps to install LED strip lights over your bed.
10 Creative Ways to Install LED Strip Lights On the Bed
Next, let’s comprehensively analyze 10 creative places to install LED light strips on the bed in the bedroom, which can help you add atmosphere and functionality to the bedroom:
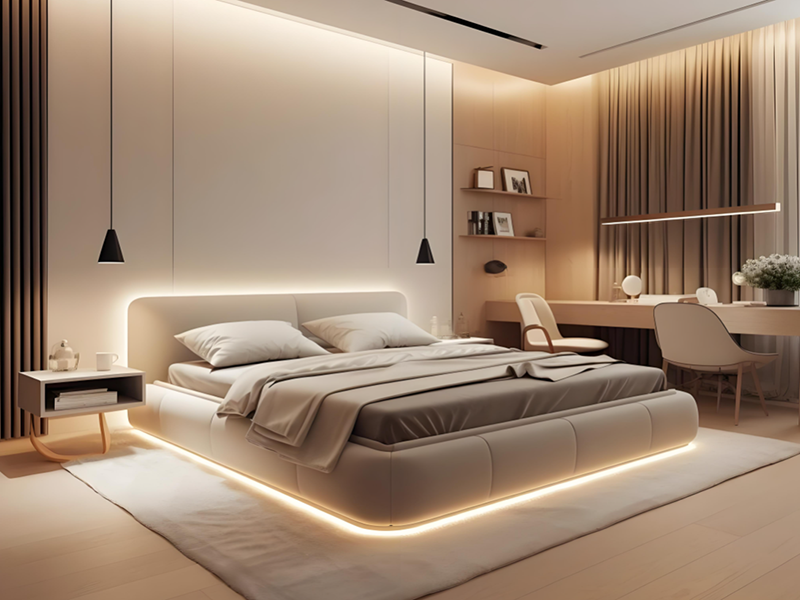
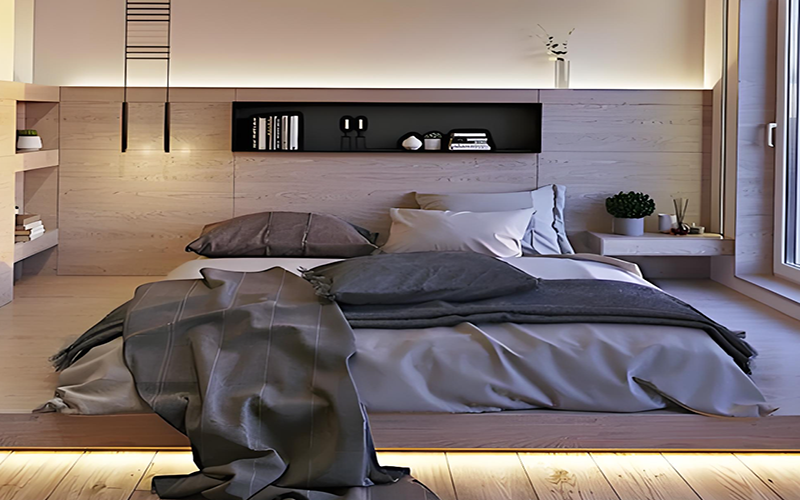
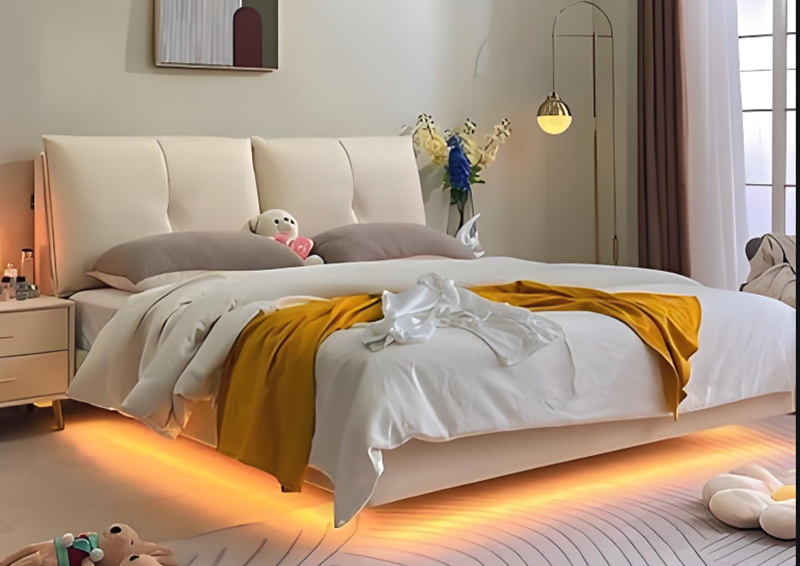
1. Under the Bed (Ambient Lighting)
Placement: Attach the LED strips to the underside of the bed frame, either near the legs or along the base.
Effect: This installation creates a soft, ambient glow beneath the bed, helping to maintain a cozy, inviting atmosphere at night. It also prevents total darkness, making it perfect for guiding your way when you wake up in the middle of the night.
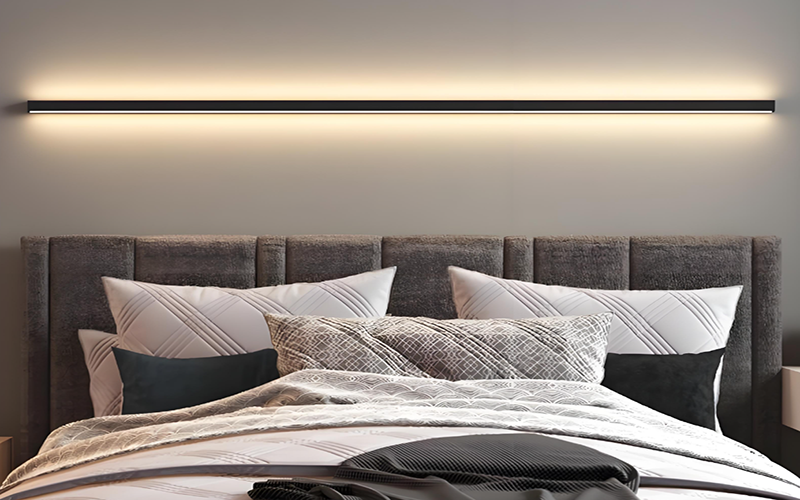
2. Behind the Headboard (Halo Effect)
Placement: Place the LED strip along the back of the bed’s headboard.
Effect: The light emitted from behind the headboard creates a soothing halo effect that envelops the sleeping area, promoting a calming and relaxing vibe. This lighting feature can contribute to better sleep quality by eliminating harsh lighting.
3. Along the Bed’s Edge (Decorative Lighting)
Placement: Attach the LED strips along the lower edge of the bed frame.
Effect: This subtly illuminates the perimeter of the bed, enhancing the visual contours and adding a stylish touch to your bedroom. It’s especially effective in modern or minimalist interiors where clean lines are key.
4. Inside Bedside Drawers (Convenient Lighting)
Placement: Install LED strips inside storage drawers or boxes under the bed.
Effect: This provides functional lighting when you need to access items in the drawers at night, eliminating the need to turn on overhead lights. It also adds a sleek touch by subtly illuminating the interior of the storage.
5. Nightlight on the Bedside Table (Low-Light Option)
Placement: Position the LED strip beneath the bedside table or headboard.
Effect: This setup offers a soft, low-light source ideal for nighttime use. It serves as a nightlight, ensuring you can get up without disturbing your sleep environment or waking others.
6. LED Strip Inside the Bed Frame
Placement: Install the LED strip along the inner sides of the bed frame, particularly at the head and foot of the bed.
Effect: This provides consistent, even illumination around the bed, adding an element of sleek design while casting intriguing light and shadows. It’s ideal for contemporary bedroom designs, where the light plays a decorative role as well.
7. Ground Projection from the Bedside
Placement: Mount the LED strip along the side of the bed, angling it slightly toward the floor.
Effect: This projects light onto the floor, creating a dreamlike, ethereal effect that can completely transform the atmosphere of your room. It’s perfect for those looking to add a personal, visually striking touch to their space.
8. Headboard Lighting with a Decorative Lightbox
Placement: Embed the LED strip into a decorative lightbox around the headboard.
Effect: A lightbox can frame the bed and provide both functional and decorative lighting. The LED strips inside will not only illuminate the bed but also enhance the overall visual appeal of the room, giving it a modern, artistic vibe.
9. Under the Footboard (Highlighting the Foot Area)
Placement: Position the LED strips along the underside of the footboard.
Effect: This creates a striking effect at the foot of the bed, ideal for highlighting bed frames with larger or more decorative footboards. It adds an accent to the bed’s design and helps visually open up the room by enhancing the overall space.
10. Decorative Lighting for the Headboard Wall
Placement: Install LED strips along the edges or corners of the bed’s headboard wall (top, bottom, or sides).
Effect: This can dramatically improve the look of the headboard wall, providing both functional lighting and creating a cozy, illuminated ambiance. The light can accentuate the textures or colors of the wall and help establish a relaxing environment.
Whether used for ambient lighting, decorative accents or functional lighting solutions, LED light strips are a flexible and energy-efficient way to enhance your space. By creatively installing LED strips in these locations around the bed, you can significantly enhance the aesthetics and functionality of your bedroom. Transform your bedroom into a light-filled, inviting retreat.
How to Install the LED Strip Lights for Your Bed?
Now we comprehensively analyze the steps to install the LED light strip on the bed, which can help you better install the LED light strip.
Materials you’ll need:
- LED strip (wattage, voltage, 2700K or 3000K — RGB, RGBW, or single-color LED strips, depending on your preference.). When you choose the 2700K or 3000K, pls read Is it Better to Have a Bedroom 2700K or 3000K?
- Power adapter (usually comes with the LED strip, but make sure it meets the voltage and wattage requirements of the LED strip.)
- Double-sided tape or mounting clips (to hold the LED strip in place.)
- Cutting tool (if you need to cut the LED strip to fit the size of your bed.)
- Cable clips or hooks (optional, to organize and secure wires.)
- Smartphone or remote control (if using a smart or color-changing LED strip) Step-by-Step Installation Process
1. Measure and Plan the Placement
The first step is to decide where you want to install the LED strip. There are several popular spots:
Under the Bed Frame: This is the most common installation area, giving a soft glow to the floor and creating an ambient light under your bed.
Around the Headboard: If you prefer to illuminate the headboard, LED strips can be placed around the edges for an elegant glow.
Along the Bedside Rails: Adding strips along the bed’s side rails can create an interesting, subtle lighting effect.
Once you’ve decided on the location, measure the length of the area where you’ll install the LED strip. This will help you determine how much LED tape you’ll need.
2 Buy LED Strip Lights
Once you have determined the installation location and LED strips, we can buy LED strips. It is best to buy LED strips that can be cut. If your bed needs more than five meters of strips, but not exactly ten meters, you can buy two rolls, then trim some and use the rest for another project.
We need to calculate the power. Generally, it is recommended to connect a power supply at one end of a 5-meter strip. For a 10-meter roll, we recommend connecting a power supply at both ends. All our LED strips are of good quality, and you can buy LED strips here.
3 Get a Power Supply
After you have chosen the LED light strip, we need to choose the LED power supply. If you choose a 12V LED light strip, you will need a 12v DC power supply. If it is a 24V LED light strip, you will need a 24v DC power supply.
Then calculate the total power of the LED light strip and buy a power supply with enough power. For example, if the total power is 80W, you need to choose a 100W power supply that is the best.
4. Remove the Backing and Apply the LED Strip
Peel off the protective backing from the adhesive side of the LED strip. Carefully align and press the LED strip into place along the area you measured. Make sure the strip is straight and flush with the surface to avoid a skewed installation.
For under-bed installations, it’s best to start in a corner or one side and work your way around. For headboard or railing installations, you can use the same method but follow the contours of the furniture.
5: Connect the LED Strip Controller
If you need to dim the light or choose a color temperature such as RGB. Then we need to install a controller. You can choose a WIFI controller or a controller with a remote control.
Before installing the LED light strip, you also need to fix the position of the LED controller. It is best to hide it so that it does not affect the appearance. We recommend using a WIFI controller so that you can control it with your mobile phone at any time without worrying about not being able to find the remote control.
6. Connect the LED Strip to the Power Supply
Once the LED strip is securely in place, connect the end of the strip to the power supply. The power adapter should have a connector that plugs into the end of the LED strip. Make sure the polarity is correct and that the connectors fit tightly.
If you have a smart LED strip with Bluetooth or Wi-Fi, you may need to download an app on your smartphone or use a remote control to pair and control the lighting.
7. Test the Lights and Secure
Once everything is installed, plug the LED light strip into an electrical outlet and turn it on. Use the remote control or app to test the functionality of the light (if using a smart LED light strip). You can adjust the brightness and color settings to your liking.
If you mount the LED light strip under the bed, you will see a soft glow illuminating the floor, creating a relaxing environment. If mounted on the headboard or side of the bed, the LED strip lights will add a dramatic decorative effect.
8. Final Adjustments
After testing the light, step back and make sure everything is aligned correctly. If needed, reposition or re-secure the light strip to achieve the desired effect.
If using a smart LED strip, adjust the settings through the app to match your preferred mood or lighting scene. Once you’re all set, you’re ready to enjoy your light show over your bed as night falls.
Conclusion
Installing an LED strip over your bed is an easy, modern, and enjoyable way to upgrade your bedroom lighting and create the perfect ambiance. Whether you want to add a subtle underlight or a colorful accent, this installation guide can help you achieve a stylish and functional lighting solution. By following these simple steps, you can enjoy a customized lighting setup that enhances the ambiance of the room and suits your style.
FAQs
You can install the LED strip in different locations to get different effects. Most people choose to install it behind the headboard to create a halo effect. Another option is to install it under the bed frame for ambient lighting. You can refer to these two installation methods.
It is usually powered directly by a power supply, but you can choose according to your own situation. There are USB power supplies and battery packs.
Yes, all our LED strips have designated cutting points (usually marked with a scissor icon). Cut only at these points to avoid damaging the circuit. After cutting, reconnect with a connector or soldering if necessary.
We recommend using warm white light, generally 2700K-3000K. Because warm white can create a comfortable and relaxing atmosphere. In addition, you can also choose color adjustment and RGB, and many people also like the atmosphere of this atmosphere.